This website is really cool, it makes homework so easy. It does complex math and gets accurate facts in an instant. So useful for daily homework. Bad thing is, you need to know how to type in commands to use it. If Google incorporate this into it’s engine, it would be 1 step closer to perfection. Let’s stop the chattering and on with the link.
Tuesday, May 26, 2009

Thursday, May 14, 2009
UBS Accounting for Linux Ubuntu
First off,I would like to say it is 100% legal.
Note: This is for the old version (9.2 SR 1) with the smart lock usb dongle for lan
WARNING: Not for the average joe.
Tutorial for client machine with windows as server
1. Install Ubuntu (obviously)
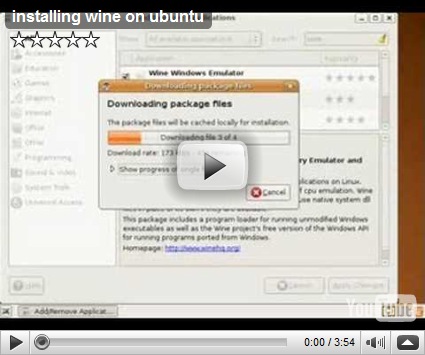
2. Install Wine
Video -
3. Insert the UBS cd.
4. If the autorun doesn’t start, in the cd, run autorun.exe(double click should do)
5. Install the selection of suite of software that you wish eg. Accounting
6. Under Applications in the top menu bar, select Wine, then Browse C:
7. Go to the WINDOWS folder
8. Double click on regedit.exe
9. In the left bar, open HKEY_LOCAL_MACHINE/SOFTWARE
8. By right clicking on the SOFTWARE folder select new KEY
9. Rename the key to McAMOS Technology
10. By right clicking on the McAMOS Technology folder select new KEY
11. Rename it to Smartlock USB LAN Version
12. By right clicking on the SOFTWARE folder select new DWORD
13. Rename it to ServerIPAddress
14. Double Click it and in the value field, type in your server ip. eg. 192.168.0.100 
15. Run UBS with the default UBS account to see if the “Education Purpose Only” Message is present on the login, if no, congrats, you have done the first part, if yes, recheck your steps.
16. To use shared folders, install samba, under the Applications in the top menu bar, select utilities then select terminal.
Type in the following-
sudo apt-get install samba
Ref - https://help.ubuntu.com/community/MountWindowsSharesPermanently
17. Type in your password and hit enter
18. Type in the following LINE BY LINE THEN HIT ENTER-
sudo update-rc.d -f umountnfs.sh remove
sudo update-rc.d umountnfs.sh stop 15 0 6 .
19. Go to your user folder
20. Create a text file
21. Open it and paste this in -
username=guest
password=
If you don’t have passwords (do not need password to access windows share)
22. Rename the text file to
.smbcredentials
23. In the terminal, type in the following -
sudo chown root .smbcredentials
sudo chmod 600 .smbcredentials
24. In fstab add the following at the last line and replace the <something> with the correct values.
//<SERVER IP>/<USB_FOLDER_NAME>/ /home/<USER_NAME>/ smbfs iocharset=utf8,credentials=/home/<USER_NAME>/.smbcredentials,dmask=775,uid=<ID_THAT_YOU_OBTAINED_JUST_NOW> 0 0
25. In Terminal, Type in the following
sudo mount –a
26. Under UBS add your company and enjoy.
Problems? Post as comment.
Note: This is done on Ubuntu 9.04 but should work on other distro/versions
Wednesday, December 24, 2008
DNS 313 – fun_plug and ftp fix
Ok, its not a fix, its a trick to solve this problem.

1. Install fun_plug
2. telnet <UR NAS IP>
3. Type “adduser –h /mnt/HD_a2 <username>”
eg: adduser –h /mnt/HD_a2 vener
4. A password prompt should appear, type in anything as you wish.
5. In the Web Admin, go to the FTP server settings, add your user with read/write permission then tick “root”
6. Go to the user menu and remove your username
7. Repeat step 3 and 4
8. Enjoy
Thursday, December 11, 2008
Flash games
Something to do while you are bored…
http://www.ferryhalim.com/orisinal/g3/bells.htm
Fun isn’t it? Prepare yourself to be addicted.
Wednesday, December 10, 2008
File sizes – bits bytes
Do you want to know why when you buy a 320GB hard drive, your computer only reports it as 298 GB? Here is the reason why.
Bits bytes heard of it? You may, you may not.
1 bit is a digit in binary, the possible numbers of a bit is either
1 or 0
also means
on or off
also means
5volts or 0volt
also means
electrical flow or no electrical flow
Sense of scale :
8 bits(b) = 1 Byte
1 kilobyte(kB) = 1024 Bytes
1 Megabyte(MB) = 1024 kiloBytes
1 Gigabyte(GB) = 1024 Megabyte
1 Terrabyte(TB) = 1024 Gigabyte
1 Terrabyte(TB) = 8,796,093,022,208 bits
Why 1 kilobyte is equal to 1024 bytes? This is because of this is way that computer counts(binary 1 or 0). In short, its 2^10.
This means its 2x2x2x2x2x2x2x2x2x2 = 1024.
Hard drive(HDD) manufactures count 1 kilobyte as 1000bytes not 1024 bytes. When you buy a 320 GB HDD, you are getting 320000000000 bytes but since computer counts 1kilo as 1024 it would only appear as 298.023223876953125 GB
This also applies to USB flash drive, RAM etc.
Tuesday, December 9, 2008
Website – jamendo.com
Click here to visit

About this website – A place where you can download free songs, yes free songs and it is entirely legal. They are all under CC license(Creative Commons), this means you are free to download and modify it to your liking but the result must be under CC license. Discover new artists with great music.
One of the my favorite artist is Rob Costlow and his piano masterpieces. LINK
Monday, December 8, 2008
Guide to file types
File types are just extensions to a file name. A dot followed by three letters/numbers or a combination of both.
Eg. picture.jpg
picture is the file name
.jpg is the file type
File type tells the computer what software to open it with, it only do this one specific thing, it does not tell what file is this.
For example
.jpg .png .gif will tell the computer to open it with Microsoft picture viewer(XP) / Microsoft photo gallery(Vista)
.doc .ppt will tell the computer to open it with MS word and MS powerpoint respectively.
You may ask why I can’t see these in my computer, that is because Microsoft hid the file type by default. To unhide it, follow these instructions. 
1. Press start and go to control panel. 
2. If you something like these (XP/Vista) look at the left bar and click classic view. 
3. Click folder options. 
4. Under the view tab search for Hide extensions for known file types and untick it.
5. Press OK 
You should be able to see the file types now.
WARNING:You will need to retain the file type when renaming the file.
Note : Changing the file type DOES NOT change the file’s data.
Sunday, December 7, 2008
December Software recommendation
My Recommended List
Anti-Virus - Kaspersky
P2P – utorrent
Office suite – MS office
Media player – VLC
Music manager – iTunes
Picture editor – Adobe Photoshop
Picture viewer – Vista Photo Gallery
PDF viewer – Foxit Reader
CD burner – CDBurnerXP
Archive manager - Winrar
Free to download - Windows
Anti-Virus - AVG
P2P – utorrent
Office suite – Open office
Media player – VLC
Music manager – iTunes
Picture viewer/editor – Picasa
PDF viewer – Foxit Reader
CD burner – CDBurnerXP
Archive manager - 7zip
Sunday, August 31, 2008
Notepad 2
I always hated notepad, it was too simple, only fit for note taking . It doesn't and can't even do simple formatting that editing php code requires. Wordpad is a better alternative, it also makes me wonder why Microsoft includes both apps which do almost the same thing?
Enter Notepad 2, a free app from http://www.flos-freeware.ch/notepad2.html . I know about notepad++ but it was giving me a headache with all those generic icons problem that I tried to solve but failed.
Here's how to replace MS notepad with notepad 2.
1. Download it from there http://www.flos-freeware.ch/notepad2.html Look for "Download Notepad2 <version here>Binary Files" NOT soruce code.
2. Download replacer http://www3.telus.net/_/replacer/ Get the stable version.
3. Extract both files.
4. Open the "Replacer" folder and execute Replacer.cmd
5. Open C:\WINDOWS, if you see this message, just click "Show the contents of the folder"

6. Search for notepad.exe

7. Click and drag it onto the replacer window, just like dragging a file across to another folder. You should see the following. 
8. Press Enter/Return on your keyboard.
9. Open your notepad2 folder, rename Notepad2.exe to notepad.exe.
10. Just like step 7, drag the renamed notepad.exe to the window. You should see this. 
11. Press enter to continue, you should see this. 
12. Type "Y" and press enter. After some lines, you may press Enter again to quit.
13. Repeat Steps 5 to 12 but this time replace the notepad.exe in C:\WINDOWS\system32
13. Reboot your computer and enjoy. 
Tuesday, August 19, 2008
Save Power

BTing and downloading 24/7 ? No restarts in weeks ? The PC sucks quite a lot of power, around 140 watts at idle up to 300 watts at full load. Fluorescent bulbs only suck around 14 watts. Computer waste a lot of energy, if you are wondering how to save power while being able to download / store information, buying NAS is the way to go.
NAS wiki article - http://en.wikipedia.org/wiki/Network-attached_storage
The math:
140W - 30W = 110W ( power you saved )
Assuming you switched on computer 24/7 just to download.
110W X 24Hrs X 365 Days = 963.6KW/H saved per year
Using my local power company electrical tariff calculator, I was going to save RM 342.26 or around 110USD which is almost enough to buy a NAS
I have a DNS-323 at home and I am very happy that I bought it.
CNet Reviews - http://www.cnet.com/topic-reviews/nas.html?tag=dir.ct
Sunday, August 10, 2008
Better Pinyin IME
Stuck with this? 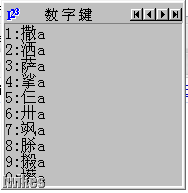
can't type continuously? Don't want to install njstar or Cstar due to high memory ,cpu consumption and lags? Then here's is a free alternative and a solution to your problems...
Introducing the Google Pinyin IME
1. Download the installer and install it.
2. In Control Panel, click on Regional and Language Settings
3. Under the languages tab, click details 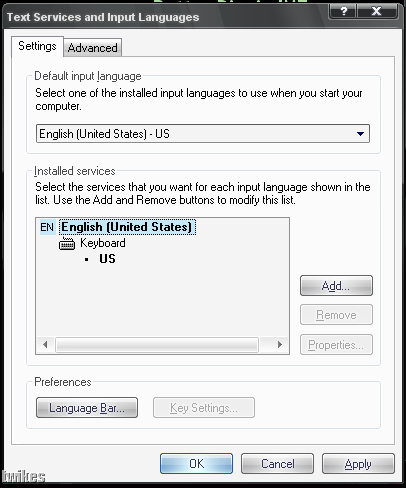
4. Click Add, and select the following. (if you don't have the following selections , follow this tip first - click here) 
5. Click ok and apply all changes
Enjoy 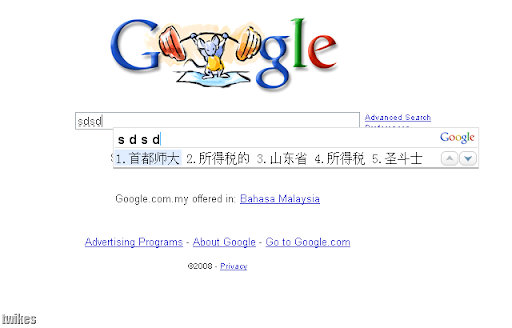
Reference - http://tools.google.com/pinyin/
Features - http://tools.google.com/pinyin/feature.html
Can't View Chinese or Japanese Characters or Pages
Having trouble with viewing pages with Japanese or Chinese characters? Seeing squares and worms? It is commonly caused by missing encodings or fonts.
Here's how to solve this problems. You will need a XP installation CD.
1. In Control Panel, click on Regional and Language Settings
2. Under the languages tab, tick the both checkboxes. 
3. Click the Advance Tab. 
4. Tick every checkbox in the list.
5. Click Apply, Insert your XP CD if prompted
You may try this tip as well - click here
Wednesday, August 6, 2008
How to Reinstall windows
Reinstalling windows is a quite a complex task for some, so this a dummies guide to reinstalling windows.
Note : This assumes that you have a previous XP installation
Reinstalling windows can be separated into three parts
1. Backup your important documents
2. Reformatting the hard drive
3. Installing windows
4. Post installation tweaks/Restore Backup
This guide only covers 2 and 3.
What you need:
Windows Installation CD
Refromating the hard drive
1. To start your computer from the Windows XP CD-ROM (or from the startup disk), your computer must be configured to start from the CD-ROM drive, the DVD-ROM drive, or the floppy disk drive. In some cases, you may have to modify your computer's BIOS settings to set this configuration. For information about how to configure your computer to start from the CD-ROM drive, the DVD-ROM drive, or the floppy disk drive, see the documentation that is included with your computer, or contact the computer manufacturer. After that you should see this. 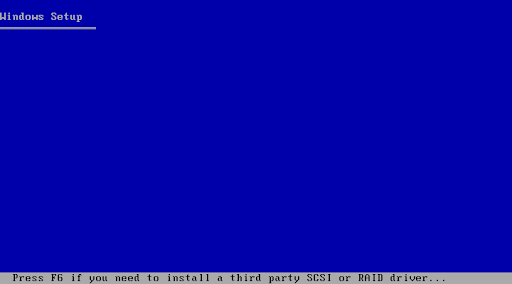
Optional - Install RAID / SCSI driver
2. Wait for a few minutes 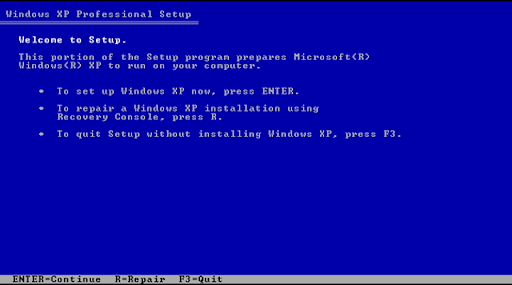
3. Press "Enter" 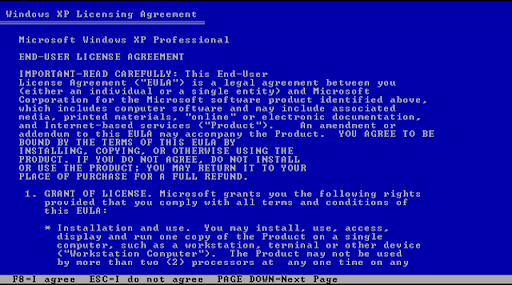
4. Press "F8" to continue 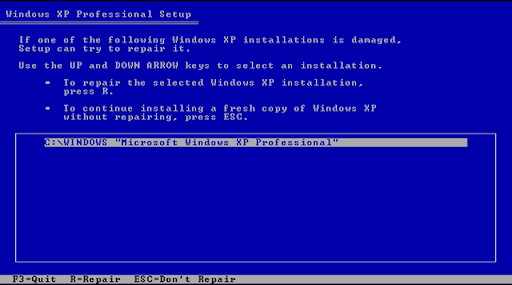
5. Press "Esc"

6. Highlight the drive you want to install XP (should be C:)
7. Press "D" 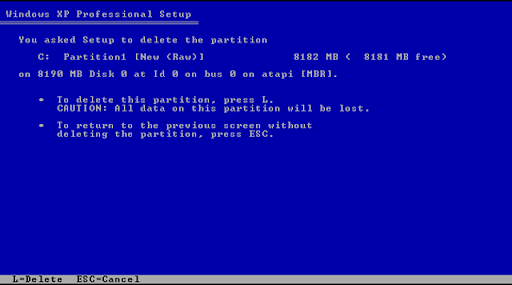
8. If you are sure that you have no vital information on your hard drive,Press "L" to confirm. 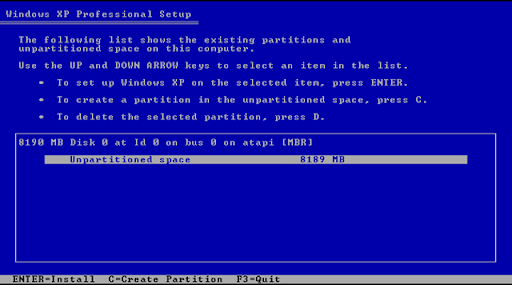
Optional - Partition your Drive(not recommended)
Why do you need to partition? Click here
Partitioning DOES NOT save you from HDD failure
Short Guide to partitioning
a) Press C 
b) Type in the size you want the partition to be
c) Press "Enter"
9. If you don't want to partition the drive, highlight the "Unpartitioned space and press "Enter". It will automatically make a partition with the maximum possible size.
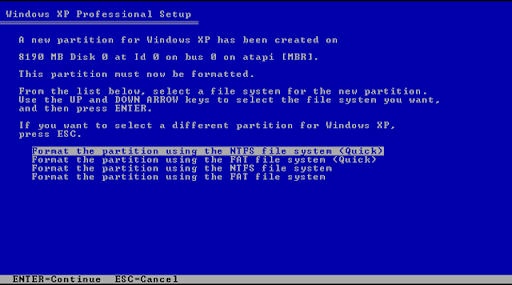
10. Highlight " Format the partition using NTFS file system <quick>" and press "Enter
For more information regarding "formatting with non quick, NTFS and FAT file system" click here and here /
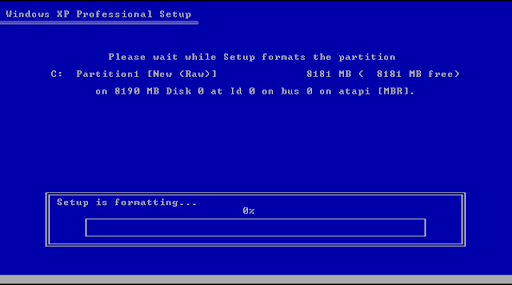
11. You have just finish formatting, from here on, don't touch anything. If you are going to continue to the next part, grab something to eat or something, it takes quite a while.
Installing Windows
If you are continuing from the last part, you should see this

1. Wait until it reaches this screen 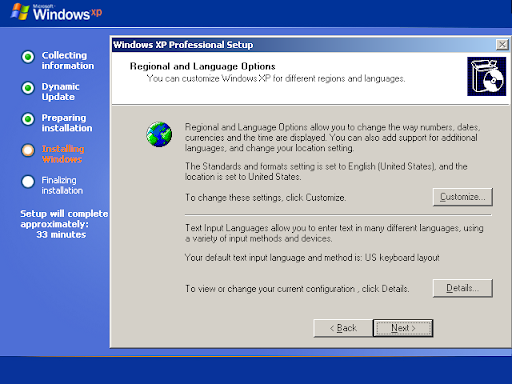
Optional - Setup and install encodings/fonts/text inputs. This step is not necessary but strongly recommended. It installs the various encodings that the web or documents uses. If you do not do the following step, some documents and web pages will not display correctly, you may do this after installing XP though.
a) Click "Customize", click the "Languages" tab and tick both checkboxes as shown in the screenshot below 
b) Click the "Advanced" tab and tick all the checkboxes as shown in the screenshot below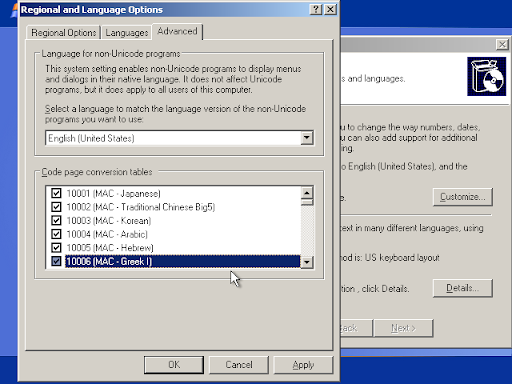
c) Press "Ok"
d) Press "Details..." and then Press "Add..." 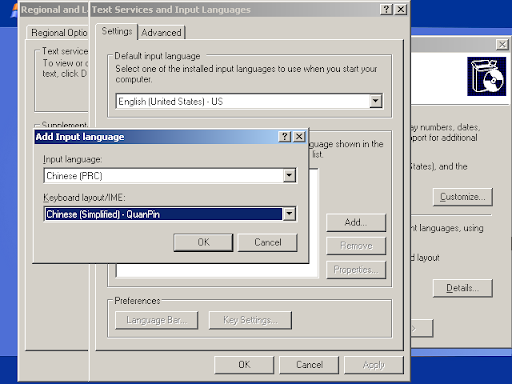
e) Select the "Input language" and "Keyboard Layout" Further Information, please click here
f ) Press "Ok" to return to the parent window 
2. Click "Next" 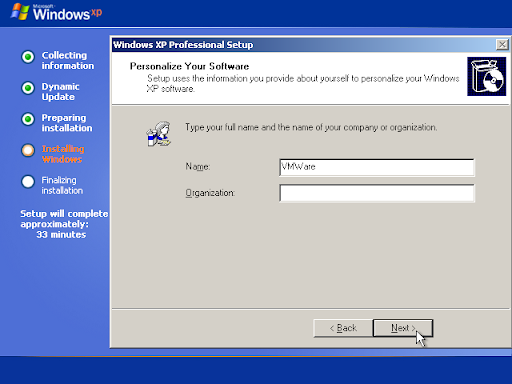
3. Key in your computer name and click "Next" 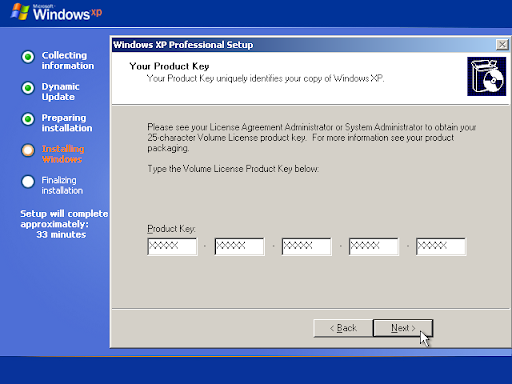
4. Key in your product code, For OEM machines, there should be a sticker on your machine with your product code on it. Click "Next" to continue. 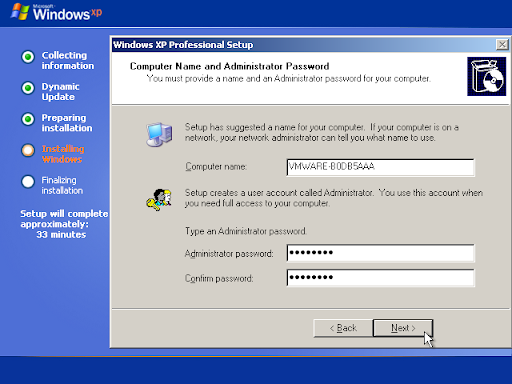
Optional - Key a Administrator Password, This is Strongly recommended, if not, this happens.
5. Click "Next" to Continue 
6. Setup your date and time, a sample is shown in the screenshot above. Click "Next" to continue 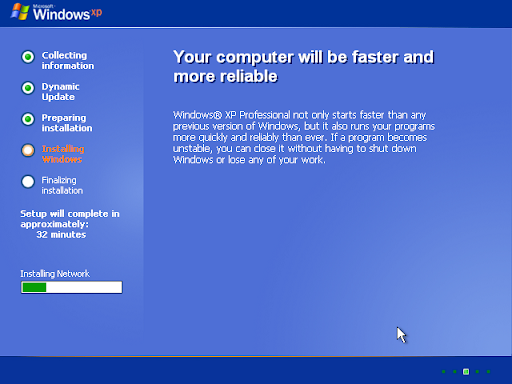
7. Wait for windows to install some stuff, takes a while. When it is done, it should look like this. 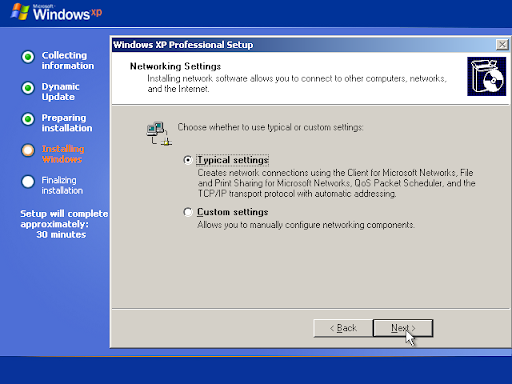
8. Unless you are in a special network, press "Next" to continue. If not, you may need to install some stuff, contact your network administrator for this.
If you don't know what it is, just press "next" will do. 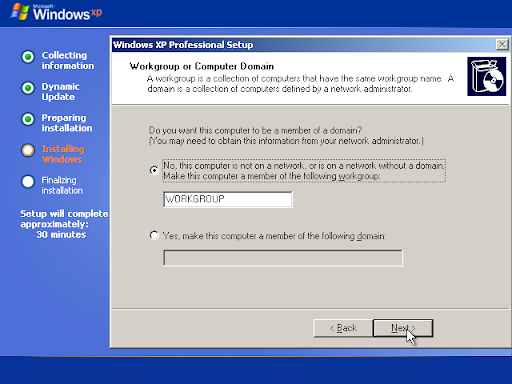
9. Again, If you don't know what it is, just press "next" will do. 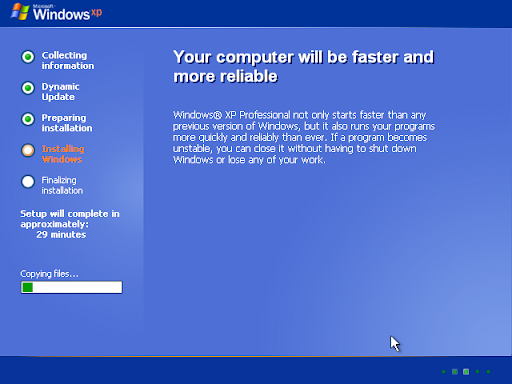
10. Wait for windows to install some stuff, takes a while. When it is done, it should reboot and will look like this. 
11. Press "Next" to continue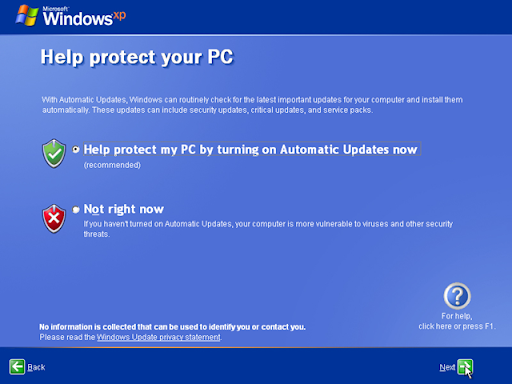
12. If you are using an original license select "Help protect my PC by turning on Automatic Updates now" else select the other one.
13. Press "Next" to continue 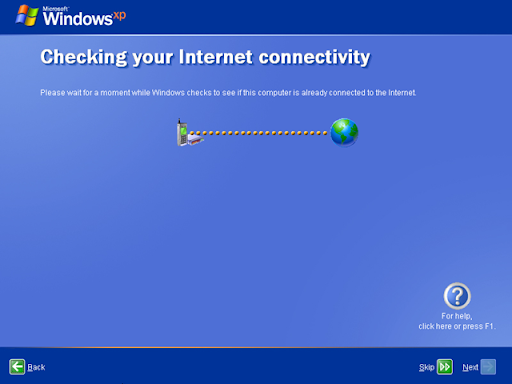
14. If you see the above page, it is most likely you are not connected to the Internet, Press "Skip" to continue.
If you have and Internet connection you should see the screenshot below instead of the above. 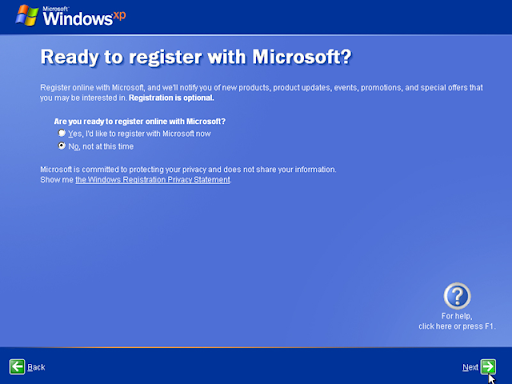
15. Select "No, not at this time" and press "Next" to continue. 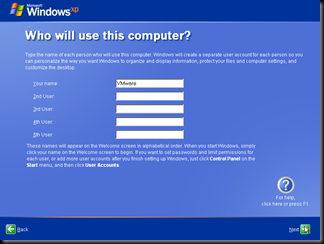
16. Fill in the names of the user of the computer and press "Next" to continue. 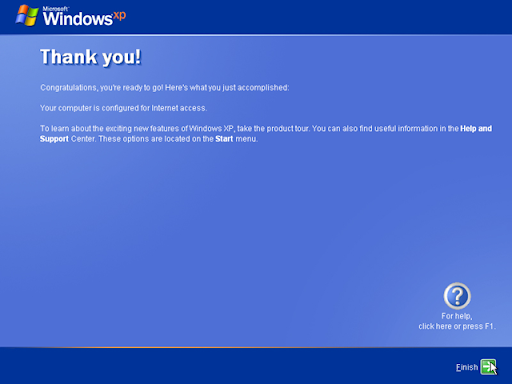
17. Press "Finish" to continue.
Congratulations, you have just finished installing a fresh copy of Windows XP.
Subscribe to:
Posts (Atom)