This website is really cool, it makes homework so easy. It does complex math and gets accurate facts in an instant. So useful for daily homework. Bad thing is, you need to know how to type in commands to use it. If Google incorporate this into it’s engine, it would be 1 step closer to perfection. Let’s stop the chattering and on with the link.
Tuesday, May 26, 2009
Thursday, May 14, 2009
UBS Accounting for Linux Ubuntu
First off,I would like to say it is 100% legal.
Note: This is for the old version (9.2 SR 1) with the smart lock usb dongle for lan
WARNING: Not for the average joe.
Tutorial for client machine with windows as server
1. Install Ubuntu (obviously)
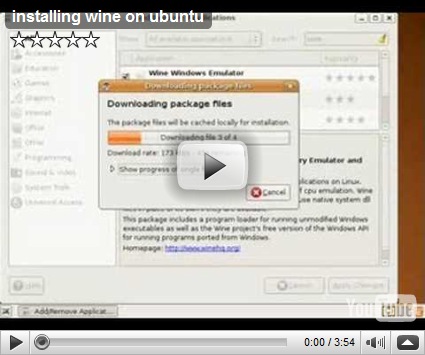
2. Install Wine
Video -
3. Insert the UBS cd.
4. If the autorun doesn’t start, in the cd, run autorun.exe(double click should do)
5. Install the selection of suite of software that you wish eg. Accounting
6. Under Applications in the top menu bar, select Wine, then Browse C:
7. Go to the WINDOWS folder
8. Double click on regedit.exe
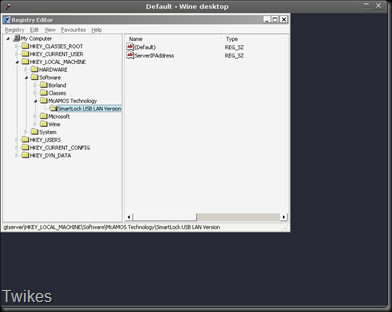
9. In the left bar, open HKEY_LOCAL_MACHINE/SOFTWARE
8. By right clicking on the SOFTWARE folder select new KEY
9. Rename the key to McAMOS Technology
10. By right clicking on the McAMOS Technology folder select new KEY
11. Rename it to Smartlock USB LAN Version
12. By right clicking on the SOFTWARE folder select new DWORD
13. Rename it to ServerIPAddress
14. Double Click it and in the value field, type in your server ip. eg. 192.168.0.100 
15. Run UBS with the default UBS account to see if the “Education Purpose Only” Message is present on the login, if no, congrats, you have done the first part, if yes, recheck your steps.
16. To use shared folders, install samba, under the Applications in the top menu bar, select utilities then select terminal.
Type in the following-
sudo apt-get install samba
Ref - https://help.ubuntu.com/community/MountWindowsSharesPermanently
17. Type in your password and hit enter
18. Type in the following LINE BY LINE THEN HIT ENTER-
sudo update-rc.d -f umountnfs.sh remove
sudo update-rc.d umountnfs.sh stop 15 0 6 .
19. Go to your user folder
20. Create a text file
21. Open it and paste this in -
username=guest
password=
If you don’t have passwords (do not need password to access windows share)
22. Rename the text file to
.smbcredentials
23. In the terminal, type in the following -
sudo chown root .smbcredentials
sudo chmod 600 .smbcredentials
24. In fstab add the following at the last line and replace the <something> with the correct values.
//<SERVER IP>/<USB_FOLDER_NAME>/ /home/<USER_NAME>/ smbfs iocharset=utf8,credentials=/home/<USER_NAME>/.smbcredentials,dmask=775,uid=<ID_THAT_YOU_OBTAINED_JUST_NOW> 0 0
25. In Terminal, Type in the following
sudo mount –a
26. Under UBS add your company and enjoy.
Problems? Post as comment.
Note: This is done on Ubuntu 9.04 but should work on other distro/versions
